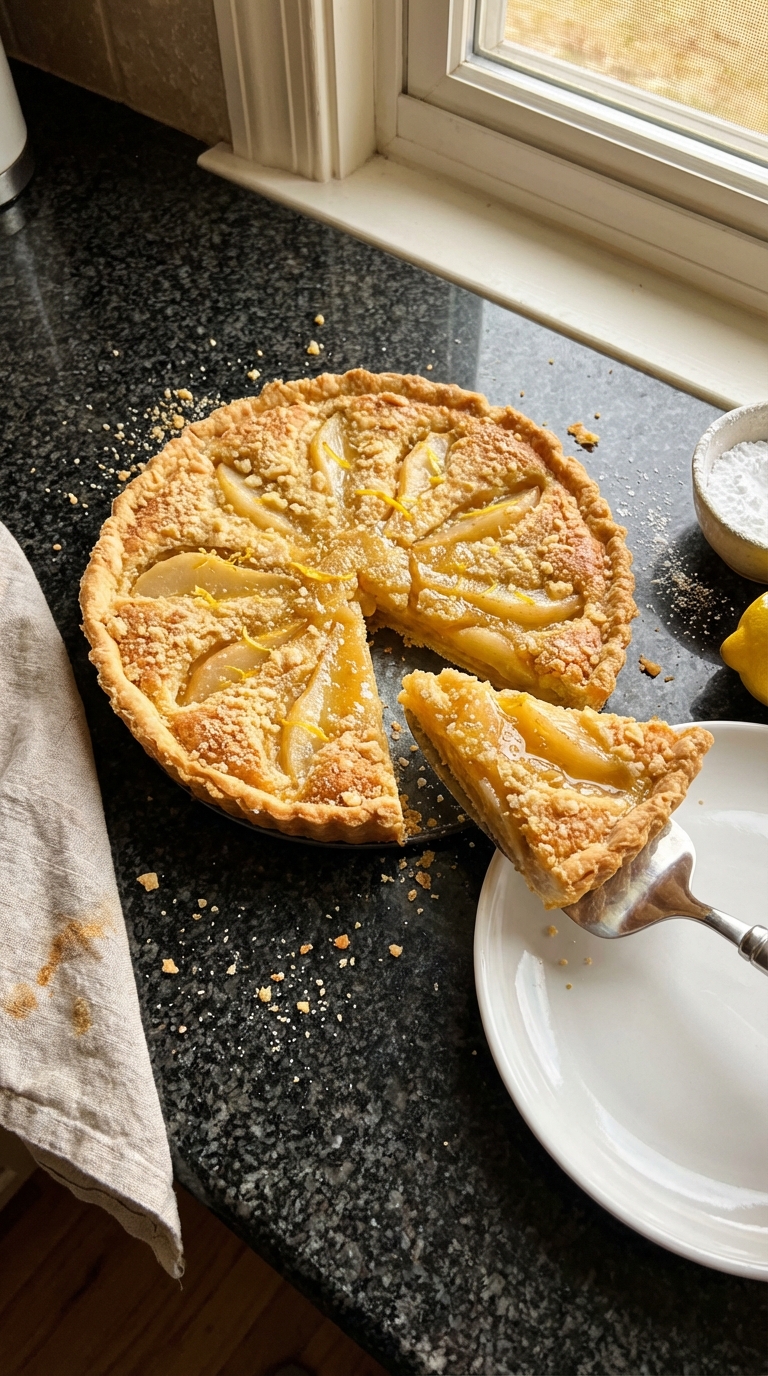
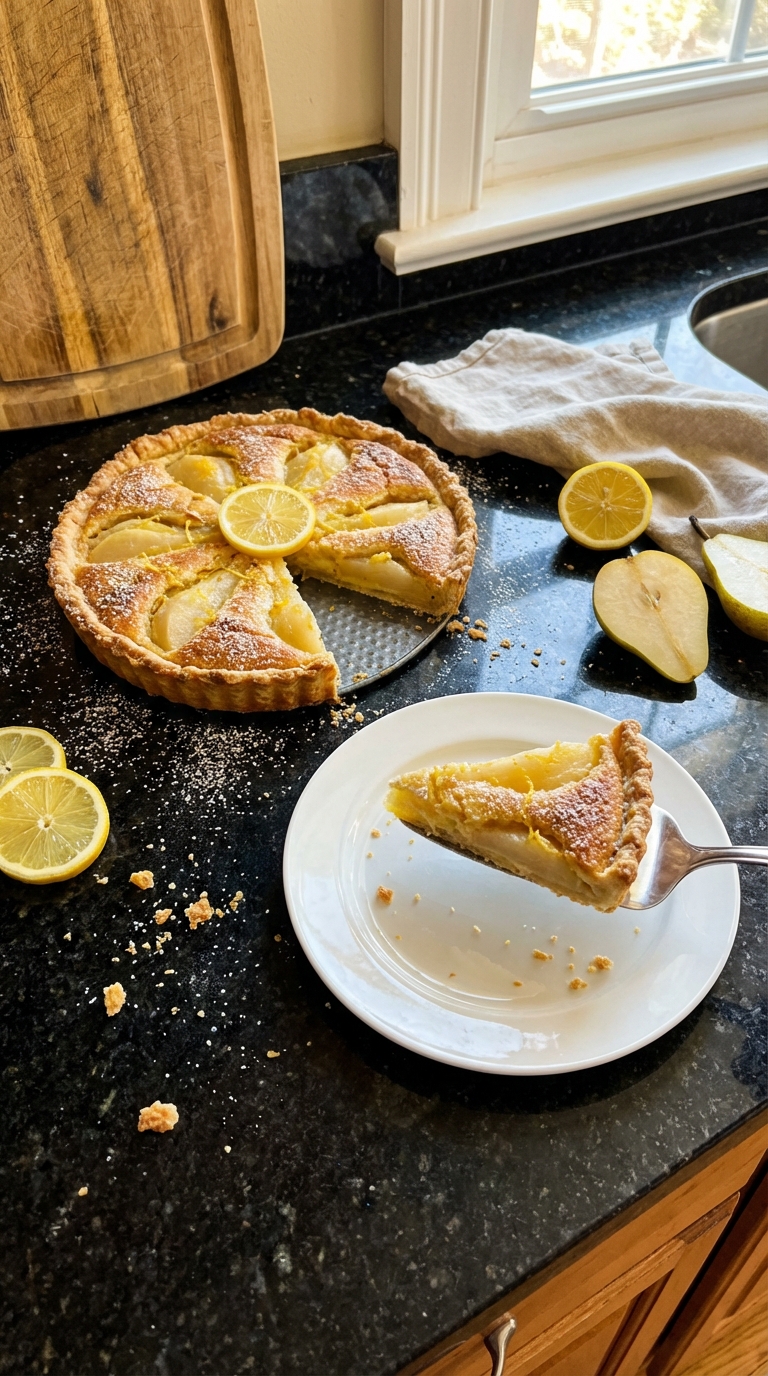
Limoncello Pear Tart
Highlighted under: Baking & Desserts
I absolutely love making a Limoncello Pear Tart, especially when I have ripe pears on hand. This tart combines the bright, zesty flavors of limoncello with the natural sweetness of pears, creating a delightful dessert that's both refreshing and indulgent. The buttery crust adds the perfect crispiness to complement the smooth filling, and it’s surprisingly easy to make! Whether for a dinner party or just a cozy night in, this tart never fails to impress my guests and satisfy my sweet tooth.
When I first combined limoncello and pears in this tart, it was a match made in dessert heaven. Using fresh, juicy pears ensures that every bite bursts with flavor, while the limoncello adds a unique tang. I love letting the filling set in the fridge for a couple of hours; it really allows the flavors to meld beautifully.
One tip I discovered is to lightly roast the pears before using them. This brings out their sweetness and enhances the overall depth of flavor in the tart. Don’t skip this step—it makes a world of difference!
Why You'll Love This Tart
- Zesty limoncello balanced with sweet, ripe pears
- Flaky, buttery crust that melts in your mouth
- Impressive dessert that's perfect for any occasion
Crust Success Tips
Getting the tart crust just right can make a significant difference in the overall texture of your Limoncello Pear Tart. When mixing the dough, be careful not to overwork it. Overworking can lead to a tough crust, while gently combining the ingredients ensures a flaky, tender result. After pressing the dough into the pan, using a fork to prick the bottom helps prevent air bubbles from forming during the pre-baking phase.
Chilling the crust for 30 minutes before baking is essential, as it helps solidify the butter, resulting in a perfectly flaky texture. Make sure your butter is softened but not melted—this gives the right balance of richness without making the dough greasy. If you find your dough is too dry, add a teaspoon of cold water at a time until it holds together without being sticky.
Filling Flourishes
The combination of flavors in the filling is what makes this tart truly special. As the pears cook in the limoncello mixture, they soften and absorb the bright citrus notes of the liquor. For the best results, choose ripe but firm pears, such as Bartlett or Bosc, which will hold their shape during cooking. If you can’t find limoncello, a homemade substitute can be made by mixing lemon juice with simple syrup and a splash of vodka.
Incorporating cornstarch into the filling helps thicken the mixture, maintaining a lovely texture that doesn't leak excessively when sliced. Mix the cornstarch with the granulated sugar before adding it to the saucepan; this prevents clumping and ensures an even consistency. The filling should be cooked until the pears are tender and the mixture appears glossy, indicating it’s ready for the tart shell.
Serving Suggestions
Presentation is key to impressing your guests, and serving this tart with a light dusting of powdered sugar adds an appealing touch. Pairing it with a dollop of whipped cream or a scoop of vanilla ice cream elevates the dessert, enhancing the overall flavor experience. Fresh mint leaves not only add a pop of color but also provide a refreshing contrast to the rich tartness of the pear and limoncello.
If you have leftovers, this tart can be stored in an airtight container in the refrigerator for up to three days. To reheat, preheat your oven to 300°F (150°C) and warm the tart for about 10-15 minutes. Alternatively, it can be enjoyed cold straight from the fridge; many find that the flavors intensify as it sits!
Ingredients
For the Tart Crust
- 1 ½ cups all-purpose flour
- ½ cup unsalted butter, softened
- ¼ cup powdered sugar
- 1 egg yolk
- 1 tablespoon cold water
- 1 pinch of salt
For the Filling
- 4 ripe pears, peeled and sliced
- ½ cup limoncello
- ¼ cup granulated sugar
- 1 teaspoon vanilla extract
- 1 tablespoon lemon zest
- 2 tablespoons cornstarch
For Garnish
- Powdered sugar for dusting
- Fresh mint leaves
Preparation
Instructions
Make the Tart Crust
In a bowl, combine the flour, softened butter, powdered sugar, egg yolk, cold water, and salt. Mix until you form a dough. Press the dough into a 9-inch tart pan, ensuring even coverage on the bottom and up the sides. Prick the bottom with a fork and chill for 30 minutes.
Pre-bake the Crust
Preheat your oven to 350°F (175°C). Bake the chilled crust for 15 minutes or until lightly golden. Remove from the oven and set aside to cool.
Prepare the Filling
In a saucepan, combine the sliced pears, limoncello, granulated sugar, vanilla extract, lemon zest, and cornstarch. Cook on medium heat for about 10 minutes, until the pears are tender but not mushy.
Assemble the Tart
Pour the pear mixture into the pre-baked tart crust, spreading it evenly. Bake in the oven for an additional 25 minutes until the filling is bubbly.
Cool and Serve
Once baked, let the tart cool to room temperature. Dust with powdered sugar before serving and garnish with fresh mint leaves.
Enjoy Your Tart!
Pro Tips
- For an added creamy touch, serve with whipped cream or vanilla ice cream alongside the tart.
Ingredient Variations
While ripe pears are the star of this tart, you can easily experiment with other fruits like apples or even stone fruits such as peaches or nectarines, adjusting the sugar slightly based on their sweetness. For an added depth of flavor, consider incorporating a tablespoon of amaretto or almond extract into the filling for a nutty undertone that pairs wonderfully with the citrus notes.
If you're looking for a gluten-free option, replace all-purpose flour with a gluten-free 1:1 baking blend. The texture may vary slightly, but it will still yield a delicious tart. Be sure to check that the blend contains xanthan gum, as it helps mimic the elasticity found in traditional flour.
Make-Ahead Tips
This tart is an excellent candidate for make-ahead preparations. You can prepare and bake the crust a day in advance, allowing it to cool completely at room temperature before storing it covered at room temperature. The filling can also be made a day ahead. Store it in the refrigerator and fill the tart crust just before baking to ensure the crust remains crisp.
If you're hosting a gathering, consider preparing individual mini tarts using tartlet pans. The baking time may be reduced to about 15-20 minutes, and they make for beautiful, single-serving desserts that are easy for guests to enjoy.
Questions About Recipes
→ Can I use other fruits instead of pears?
Absolutely! Apples or peaches would work wonderfully in this tart.
→ How long can I store the tart?
The tart can be stored in the refrigerator for up to 3 days. Just make sure to cover it to prevent it from drying out.
→ Can I make the crust ahead of time?
Yes, the tart crust can be made a day in advance and stored in the fridge until you're ready to use it.
→ Does the alcoholic content of limoncello evaporate when baked?
Yes, most of the alcohol will evaporate during baking, but it will leave behind the wonderful flavor!
Limoncello Pear Tart
Created by: The Novarecipelab Team
Recipe Type: Baking & Desserts
Skill Level: Intermediate
Final Quantity: 8 servings
What You'll Need
For the Tart Crust
- 1 ½ cups all-purpose flour
- ½ cup unsalted butter, softened
- ¼ cup powdered sugar
- 1 egg yolk
- 1 tablespoon cold water
- 1 pinch of salt
For the Filling
- 4 ripe pears, peeled and sliced
- ½ cup limoncello
- ¼ cup granulated sugar
- 1 teaspoon vanilla extract
- 1 tablespoon lemon zest
- 2 tablespoons cornstarch
For Garnish
- Powdered sugar for dusting
- Fresh mint leaves
How-To Steps
In a bowl, combine the flour, softened butter, powdered sugar, egg yolk, cold water, and salt. Mix until you form a dough. Press the dough into a 9-inch tart pan, ensuring even coverage on the bottom and up the sides. Prick the bottom with a fork and chill for 30 minutes.
Preheat your oven to 350°F (175°C). Bake the chilled crust for 15 minutes or until lightly golden. Remove from the oven and set aside to cool.
In a saucepan, combine the sliced pears, limoncello, granulated sugar, vanilla extract, lemon zest, and cornstarch. Cook on medium heat for about 10 minutes, until the pears are tender but not mushy.
Pour the pear mixture into the pre-baked tart crust, spreading it evenly. Bake in the oven for an additional 25 minutes until the filling is bubbly.
Once baked, let the tart cool to room temperature. Dust with powdered sugar before serving and garnish with fresh mint leaves.
Extra Tips
- For an added creamy touch, serve with whipped cream or vanilla ice cream alongside the tart.
Nutritional Breakdown (Per Serving)
- Calories: 320 kcal
- Total Fat: 18g
- Saturated Fat: 10g
- Cholesterol: 35mg
- Sodium: 95mg
- Total Carbohydrates: 38g
- Dietary Fiber: 2g
- Sugars: 20g
- Protein: 3g